
The Ultimate Guide to DIY Garage Door Installation
Take off on a revolutionary trip with “The Ultimate Guide to DIY Garage Door Installation,” transforming your projects related to home renovation. Learn about the nuances of garage door choices and arm yourself with the knowledge of space evaluation that is necessary. Make your way through the selection of materials and equipment, always keeping safety first. Armed with this information base, you can confidently open the doors to the makeover of your garage.
Planning for DIY Garage Door Installation
The first step in organizing a do-it-yourself garage door installation is to familiarize yourself with the available several varieties: sectional doors, which have horizontal panels to maximize space; roll-up doors, which are small and perfect for spaces with limited headroom; and side-hinged doors, which have a classic swing-out style. Make informed decisions for a practical project that meets your needs.
Understanding different types of garage doors
A successful project in the maze of do-it-yourself garage door installation requires an awareness of the various garage door breeds. We will explore the three main archetypes: Sectional, Roll-up, and Side-hinged, providing insightful insights.
- Sectional: This excellent modular piece comprises horizontal panels hinged together, gliding effortlessly upward on tracks. Sectional doors, which maximize the use of available space, are well-known for their smooth functioning and modern design.
- Roll-up: As its name suggests, the roll-up door unfolds vertically to form a little coil above the aperture. Roll-up doors are popular in commercial settings and garages with low headroom because of their durable and space-saving construction.
- Side-hinged: These doors have a classic beauty as they swing outward from a central axis. Side-hinged doors provide simple installation and quick access and are highly regarded for their traditional appearance and timeless appeal.
With these distinct profiles at your fingertips, you can confidently navigate the nuances of garage door selection and embark on your DIY installation journey.
Measuring and assessing the garage space
The garage area must be carefully measured and assessed before beginning the thrilling DIY project to install a garage door. Verify the measurements with a measuring tape and close attention to detail to ensure the depth, width, and height are correct. Consider any obstructions or abnormalities, including above pipes or electrical outlets, that can make the installation more difficult.
By preventing potential issues and setting the stage for a trouble-free installation, this scouting mission guarantees a custom fit for your garage door. Remember that precise measurements translate into excellent execution, transforming your garage into a stylish and functional retreat.
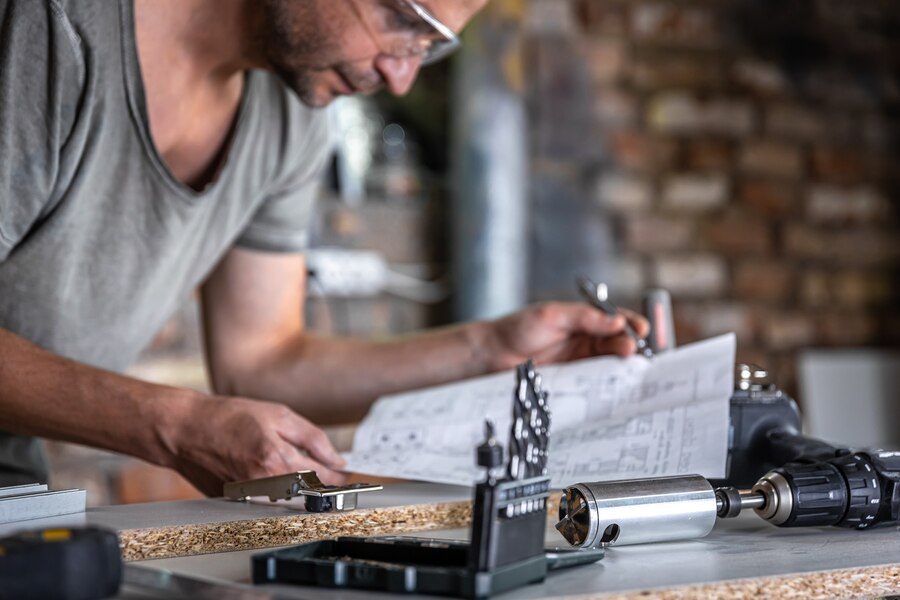
Choosing the suitable materials and tools for the installation
Choosing the best supplies and equipment for do-it-yourself garage door installation is crucial. Put compatibility and longevity first, selecting premium parts appropriate for the door type you have selected. A level, wrenches, and a power drill are essential instruments that guarantee accuracy and effectiveness throughout the installation process, resulting in a flawless and long-lasting finish.
- Garage door kit options: Look into comprehensive packages specific to your door type when evaluating garage door kit options for do-it-yourself installation. These kits usually come with all the needed parts, from panels and track to hardware and springs, making installation easier and guaranteeing compatibility for a smooth, polished finish.
- Essential tools required for the installation: These are essential for a successful do-it-yourself garage door installation. A toolbox should have a power drill for hole drilling, wrenches for tightening hardware, a level for verifying correct alignment, and safety gear like goggles and gloves. Purchasing high-quality tools improves accuracy and productivity during the installation procedure.
 Safety Precautions
 Safety Precautions
 When installing a garage door on your own, safety comes first. Wear safety gear such as goggles and gloves, and have a backup plan if something goes wrong. Follow safety procedures to the letter to reduce risks and guarantee a safe working environment for you and other participants.
- Ensuring installation safety is crucial to prevent potential hazards and mishaps. To reduce risks and guarantee a safe working environment for you and other participants, prioritize caution and attention to safety protocols at every project stage.
- Put on the proper safety clothing and equipment to protect yourself from harm. This entails donning protective goggles to protect eyes from debris, strong gloves to protect hands from sharp edges, and a hard hat to prevent head bumps or falling objects.
- Expect the unexpected and be ready for any obstacles that may come up during the installation process. Handling any unforeseen hurdles entails having a contingency plan, being knowledgeable about emergency procedures, and keeping clear contact with any aides or witnesses.
Step-by-Step DIY Garage Door Installation Guide
The step-by-step do-it-yourself installation guide provides a thorough method for rapidly installing your garage door. This guide guarantees a smooth process for remodeling your garage area, from pre-installation preparation to component assembly and track installation.
- Pre-installation preparation
- Clearing the garage space: Ensure a clutter-free environment by removing any items or obstructions from the garage. This facilitates easy movement and provides a safe working space for the installation process.
- Checking the existing garage door: Evaluate the condition of the current garage door, looking for any damages, misalignments, or malfunctioning components. Addressing these issues beforehand ensures a seamless transition to the new installation.
- Assembling the garage door components
- Following manufacturer instructions: Carefully review and adhere to the instructions provided by the garage door manufacturer. Each brand may have specific guidelines for assembly, and following them ensures a proper and secure installation.
- Organizing and labeling parts: Before assembly, label all components appropriately. This helps streamline the process, minimizing confusion and making it easier to locate and use each part during installation.
- Installing the garage door tracks
- Proper positioning and alignment: Ensure accurate positioning of the garage door tracks, aligning them meticulously along the sides of the garage. Precise alignment is crucial for the smooth operation of the door and prevents potential issues in the future.
- Attaching the springs, cables, and rollers
- Understanding the role of each component: Familiarize yourself with the function of springs, cables, and rollers in the garage door mechanism. Springs provide a counterbalance, cables support the door’s weight, and rollers facilitate smooth movement along the tracks.
- Ensuring proper tension and balance: Carefully adjust the tension in the springs and cables to achieve optimal balance for the garage door. Proper tension ensures smooth operation, prevents premature wear, and enhances safety during use.
- Mounting the garage door opener
- Wiring and programming the opener: Follow manufacturer instructions to correctly wire and program the garage door opener. This involves connecting electrical components, setting up remote controls or keypads, and programming settings such as travel limits and force adjustments.
- Testing the functionality: After installation, thoroughly test the garage door opener to ensure it operates smoothly and responds correctly to commands. Test both manual and remote operation, and make any necessary adjustments to settings or components for optimal functionality.
Troubleshooting Common Issues
Getting through the maze of do-it-yourself garage door installation frequently reveals unanticipated difficulties. However, one can quickly overcome typical obstacles with enough knowledge and ingenuity. It takes an inventive mind and an excellent eye for detail to troubleshoot typical problems. Whether tension imbalances impede correct functioning or misalignments impede a smooth movement, every obstacle offers a chance to demonstrate problem-solving skills.
Taking on the persona of a detective, painstakingly examining the many parts and evaluating how they interact with endurance and patience leads to discovering remedies that bring the garage door mechanism back into balance. Recall that obstacles in do-it-yourself projects are not barriers to success but rather steps toward mastery.
Maintenance Tips for a Long-lasting Garage Door
With these upkeep suggestions, you can prolong the lifespan of your garage door. Components are kept operating smoothly by routine cleaning, lubrication, and inspections. To avoid mishaps, check safety features and tighten hardware. Furthermore, weatherproofing protects against the environment, extending the door’s life and functioning.
- Regular inspections and lubrication: Conduct routine inspections of your garage door’s components, such as springs, rollers, and tracks. Lubricate moving parts with a high-quality silicone or lithium-based lubricant to reduce friction and prolong their lifespan.
- Cleaning and debris removal: Keep the garage door and surrounding areas clean to prevent dirt, debris, and grime buildup. Regularly sweep or vacuum the tracks and wipe down the door panels with mild detergent to maintain appearance and functionality.
- Tightening hardware: Periodically check and tighten all hardware, including bolts, nuts, and screws, to ensure they are secure. Loose hardware can cause misalignments and compromise the integrity of the garage door system.
- Testing safety features: Regularly test the safety features of your garage door, such as the auto-reverse mechanism and photo-eye sensors. Verify that they are functioning correctly to guard against mishaps and guarantee the security of people and property.
- Weatherproofing: Protect your garage door from the elements by applying weather-stripping to the bottom edge and sides. This helps seal out drafts, moisture, and pests, extending the door’s life and maintaining a comfortable environment inside the garage.
Conclusion
As we end The Ultimate Guide to DIY Garage Door Installation, we have completed a life-changing adventure that has taught us the nuances of garage improvement from planning to execution. With perseverance and creativity, we have worked through the maze of parts, troubleshooting, and maintenance.
Now that you have more knowledge and creativity, you can start your do-it-yourself project and turn your garage into a stylish and functional haven. Recall that every obstacle you face is a step closer to mastery, and your confidence grows with every success. Accept the adventure, and may the garage door installation serve as evidence of your skill and commitment.